


For those looking to save some cash and complete wall panel installations on their own, two absolutely necessary tools in your kit should be reliable adhesives and sealants. These materials serve as the secret champions behind clean finishes, waterproof assemblies, and long-lasting durability.
But with a variety of sealants and adhesives currently on the market, knowing which one to choose to successfully complete a particular task can feel quite overwhelming. Whether you're working with decorative interior wall panels, heavy-duty exterior cladding, or specialised panels like acoustic, in this guide, we’re going to cover everything you need to know about choosing the right adhesives and how to use them for secure installation.
Why are sealants and adhesives important when installing panels?
Sealants and adhesives offer way more than just surface-level support and provide a strong, flexible bond between panels and your walls, ensuring a secure attachment. They effortlessly ensure a durable, water-tight, and aesthetically pleasing finish all while filling in gaps and preventing moisture. This prevents issues like panel detachment, water damage, and mould growth and without them even the most premium wall panels can fail to perform or maintain their appearance over time.
What are the differences between adhesives and sealants?
While both adhesives and sealants can be used to fix two materials to one another, there are a few differences between these two products that we recommend keeping in mind before starting your DIY job.
Sealants - Sealants are more flexible and are better for filling in gaps and providing the finishing touches to your fixings.
Adhesives - Adhesives are often stronger and capable of holding more weight, making them more suitable for joining two materials together.
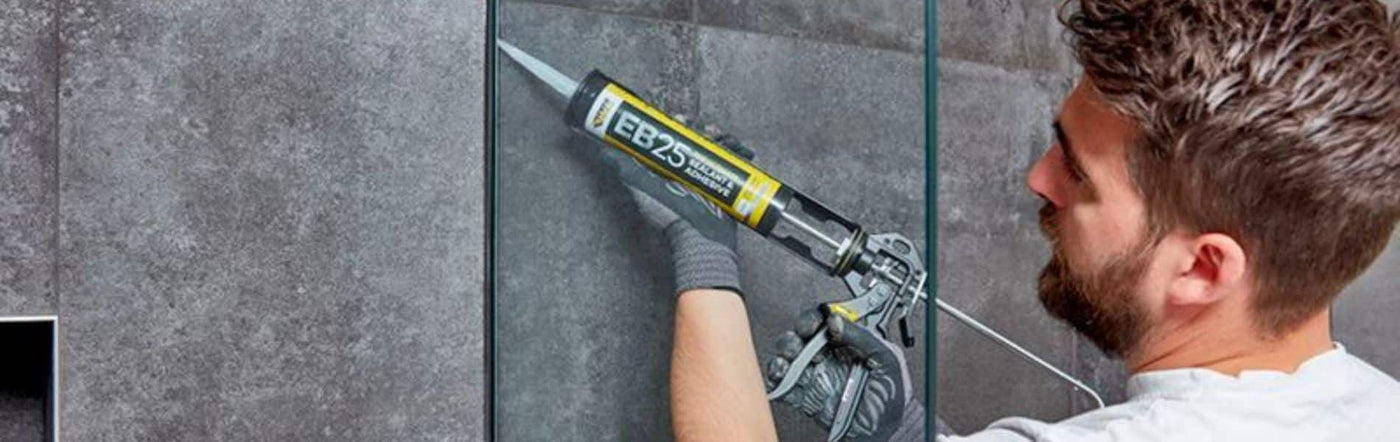
You can even find some products like this EB25 White Sealant & Adhesive that combines the two to make an easy solution for your home, mixing the strong abilities of adhesive with the flexibility of sealants.

EB25 White Sealant & Adhesive - £10.49
How to use adhesives and sealants
Now we’ve discussed a little bit about what they are and the differences between them, let’s move onto how to prepare and apply them the right way for a reliable and professional quality finish to help elevate your home look.
-
Preparing for application
Firstly, it’s important that any surfaces you’re going to be using are thoroughly cleaned, ensuring they’re dry and free from dust, dirt and other debris before you carry out the job. Excess dust and dirt can affect how well your panels are fixed to the walls and starting with a clean base will ensure long-lasting results.
You’ll also want to ensure that any and all safety precautions are implemented, these include:
-
Opening a window for proper ventilation
-
Wearing a mask to help prevent inhaling any chemicals
-
Wearing gloves to help reduce the chances of any adhesive or sealant from sticking to your skin, as these can be incredibly difficult and painful to remove from the skin.
-
Clearing up your workspace as most adhesives are flammable, so we highly recommend ensuring there’s nothing lying around which could potentially interact with these and cause a fire.
If you’re ever feeling unsure then here should be a set of instructions on each bottle of adhesive or sealant, which we strongly advise taking the time to read before getting started.
-
Applying your sealants and adhesives
Applying sealants and adhesives for wall panels requires precision to ensure a secure, long-lasting installation.
For adhesives, use a sealant gun such as this Professional Sealant Gun C4 or a notched trowel to apply the product in continuous vertical beads or an “S” pattern, depending on the manufacturer’s guidelines (check the bottle or manufacturer website if you’re unsure). Press the panel firmly against the wall, applying even pressure to ensure full contact and proper bonding. Temporary supports or spacers may be used while the adhesive cures, especially for heavier panels.

Professional Sealant Gun C4 - £11.99
Once all panels are in place and aligned, seal the joints and edges using a compatible sealant. Apply the sealant in a smooth, continuous bead along all seams, then tool it with a gloved finger or finishing tool to ensure a clean finish and full contact with the surfaces.
-
After installation
After installation, you’ll want to wait for the solutions to cure properly. The instructions and time for letting them set should be on the can or with the instructions - it’s important to check what the manufacturer recommends as the timings may change depending on the brand. You should make sure it’s fully dry before introducing any kind of moisture or weight, or further finishing work.
What are sealants used for?
As discussed previously, sealants are mostly used for filling in gaps and to help prevent moisture from getting behind the panels. These gaps can often be too small for other materials such as concrete to be used as an effective solution, which is where sealants can come in handy. Below are a few examples of how sealant can be used in the home:
-
Roofs and gutters - They’re a great solution for repairing gaps and cracks. Specific roof and gutter sealants can be used to help prevent leaks in an easy, hassle-free way.
-
Windows and doorframes - You can use a waterproof sealant to fill gaps or cracks in window and door frames. This can help to prevent water from leaking through and causing mould or rot on the wood.
-
Preventing damp in high moisture areas - Sealants are perfect for small scale DIY projects in your home such as kitchens and bathrooms. Great for using around toilets, basins, baths and showers to help reduce the chance of damp from reaching your walls which can cause an uninvited build-up of mould and mildew, we recommend silicone or sealants such as Everflex 700T Contractors LMN Silicone for this type of job.

Everflex 700T Contractors LMN Silicone - £4.99
What are adhesives used for?
Used to bond materials together, adhesives are an essential product for a number of everyday installation jobs, such as installing PVC wall panels, shower wall panels, or even flooring. But before you start a project, you should always ensure you’re using the correct adhesive for the job you have in mind.
A few common adhesives and their uses include:
-
Contact adhesives (rubber based) - Arguably the most common type of adhesive, contact adhesives are frequently used to bond laminates to wood, boards and plaster. However, even if it’s a popular choice, it’s not suitable for all materials so we recommend reading the manufacturer's guide beforehand.
-
PVA (polyvinyl adhesive) - commonly referred to as ‘wood glue,’ PVA glue,’ or ‘white glue,’ PVA forms a flexible yet durable bond when it dries, making it ideal for porous materials like timber, MDF, and plasterboard. PVA solutions also often contain waterproof properties, making them ideal for use in wet or damp environments.
-
Two-part adhesives (epoxy resins) - These adhesives are high-performance bonding agents valued for their exceptional strength, durability, and resistance to environmental stress. Epoxy resins are frequently used for sticking metal, stone, ceramics and plastic to wood and glass. In some instances, these can be toxic, so we recommend paying close attention to warning labels and taking the appropriate safety precautions.
-
Super glue - A popular solution used for many DIY ventures, super glues (also known as cyanoacrylates) are a great way for sticking smaller pieces together. Similar to two-part adhesives, these can be used on materials such as ceramic, metal, glass and plastic.
Get reliable sealants and adhesives with Panel Company
The careful selection and proper application of sealants and adhesives are essential to the success and longevity of any wall panel installation. The right solutions can contribute to structural integrity, protect against moisture and air infiltration, enhance aesthetic finishes, and ensure panels perform well in a variety of environments.
If you’re still looking for the best sealants and adhesives on the market then browse our full collection here at Panel Company and make your next DIY project feel effortless and look professional.


